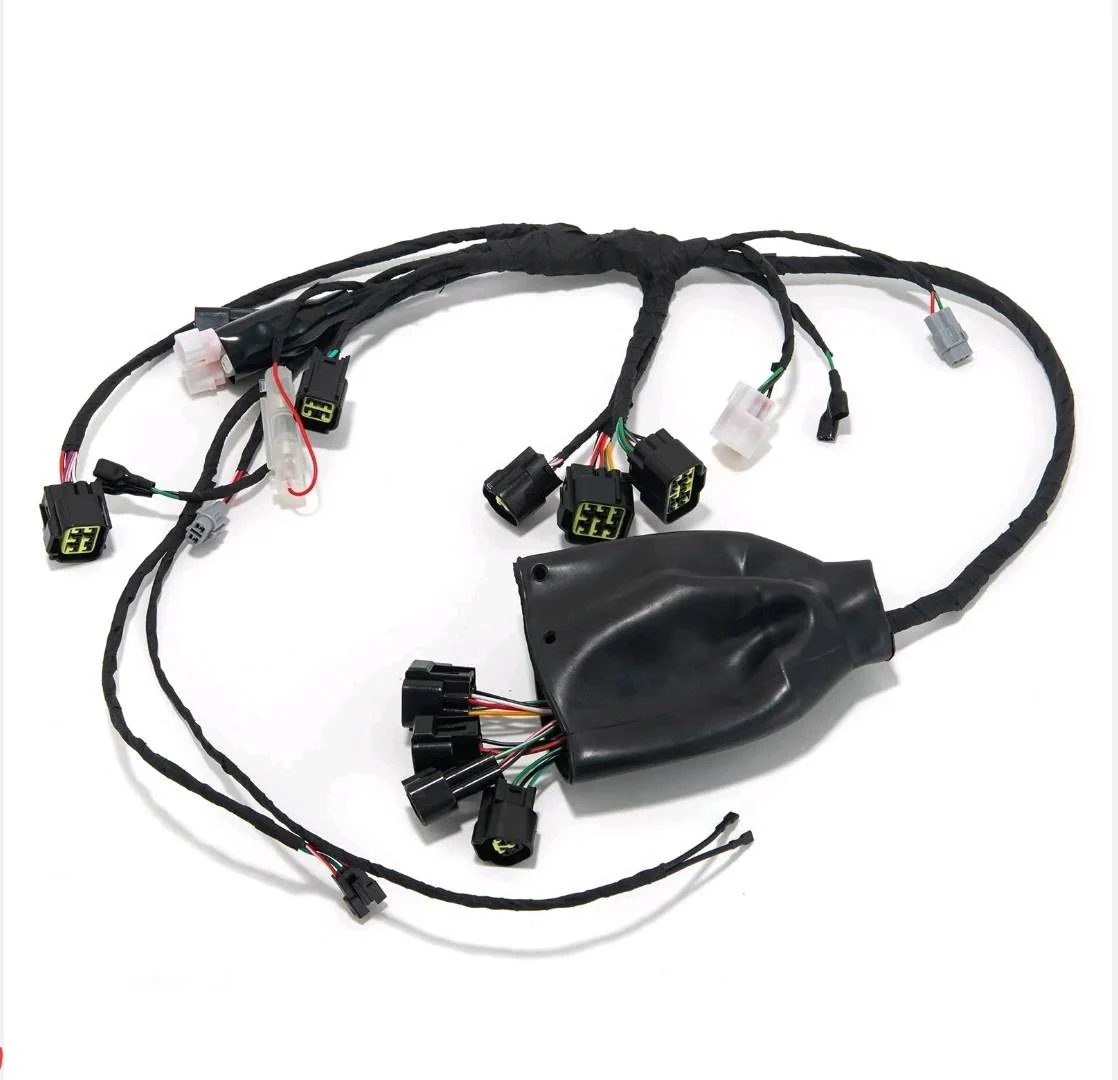
Surron Light Bee Wiring Harness For Sale Online In Europe
Surron Light Bee Wiring Harness For Sale Online In Europe is essentially the central nervous system of the bike. It connects the bike’s electrical components, enabling power distribution, communication between modules, and signal relay across the system.
More than just a collection of wires, the harness is a pre-organized bundle that ensures the electrical integrity and functionality of the bike’s subsystems — including the motor, battery, lights, controller, throttle, brakes, dashboard, and more. It’s critical for safe and smooth operation.
2. Purpose and Function of Surron Light Bee Wiring Harness For Sale Online In Europe
The wiring harness in the Surron Light Bee performs several essential functions:
-
Power Distribution: It routes current from the 60V/72V battery to the motor, controller, and other components.
-
Signal Communication: It transmits digital and analog signals between the controller, throttle, brake sensors, hall sensors, and display.
-
Grounding: Provides a unified grounding system to prevent electrical noise and ensure consistent voltage levels.
-
Sensor Feedback: Relays information from temperature sensors, hall sensors, and brakes to the controller.
-
Lighting and Accessories: Powers the headlight, tail light, horn, and optional indicators.
The design ensures that all components function in harmony without electrical interference or voltage drop. If any part of the harness is damaged or poorly connected, it can lead to system failures, reduced performance, or even safety hazards like sudden power cuts.
3. Components and Terminals of the Harness
Surron Light Bee Wiring Harness For Sale Online In Europe is composed of various connectors, plugs, fuses, and wires, color-coded and grouped based on their function. Below is a breakdown of major components and where they connect:
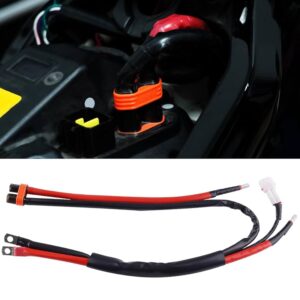
a. Main Battery Power Line
-
Connects the battery output (60V or 72V) to the controller and auxiliary power converter.
-
Often shielded for high-voltage protection.
b. Motor Phase Wires (Thick Wires)
-
Three high-current wires: Yellow, Green, Blue.
-
These wires connect the controller to the motor and are responsible for driving the motor phases.
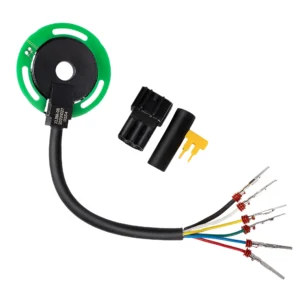
c. Hall Sensor Wire Bundle
-
Usually a 5-pin or 6-pin connector.
-
Wires: Red (5V), Black (Ground), Yellow/Green/Blue (Signal), White (sometimes used for temp sensor).
-
Reads rotor position for smooth motor control.
d. Throttle Connector
-
A 3-pin plug (Red = 5V, Black = Ground, Green = Signal).
-
Transmits throttle position to the controller.
e. Brake Cut-off Sensors
-
2-pin connectors (typically black).
-
Disconnect motor power when brakes are engaged.
f. Handlebar Switch Assembly
-
Controls headlight, horn, and sometimes turn signals.
-
Wires connected to 12V DC converter and lighting circuit.
g. Headlight and Tail Light Connectors
-
2-pin or 3-pin connectors, typically marked or color-coded.
-
Runs off a DC step-down converter from 60V/72V to 12V.
h. Controller Plug
-
Multi-pin connector for communication with display, throttle, hall sensors, and braking.
-
Often waterproofed with a silicone seal.
i. Display (Speedometer)
-
Receives and transmits data from the controller via a 5V signal wire.
-
May include trip info, speed, error codes, and battery status.
j. 12V DC Converter
-
Steps down battery voltage to power lighting and USB accessories.
-
Usually has two outputs: constant and switched.
4. Wiring Layout & Schematic Overview
Understanding the layout helps during upgrades or troubleshooting. The Light Bee harness typically follows this layout:
Key Paths:
-
Power Path: Battery (60/72V) → Controller → Motor
-
Control Path: Throttle/Brake/Display → Controller
-
Accessory Path: DC-DC Converter → Lighting & USB
Each wire is bundled and routed through the frame using clips and rubber grommets to avoid wear or vibration damage. Waterproof connectors are used in critical areas to resist mud, rain, and off-road debris.
Color Coding (Typical):
| Color | Function |
|---|---|
| Red | Power (5V or 12V) |
| Black | Ground |
| Blue | Motor Phase or Signal |
| Green | Throttle/Signal |
| Yellow | Motor Phase/Signal |
| White | Temperature or Signal |
Most stock harnesses are labeled with tags or stamped connectors to simplify assembly and replacement. However, DIY or aftermarket systems might require manual tracing.
5. Diagnostic Role & Common Failures
The wiring harness also plays a vital role in diagnostics. The controller relies on feedback from sensors and switches connected via the harness. Common issues often originate here:
Common Faults:
-
Loose or Damaged Connectors
-
Causes intermittent power loss, flickering lights, or throttle dropouts.
-
-
Corrosion in Connectors
-
Often due to water ingress or mud. Preventable with dielectric grease.
-
-
Broken Wires Inside the Sheath
-
Especially around the steering head where wires flex constantly.
-
-
Sensor Failures
-
Faulty throttle, hall sensors, or brake switches can trigger limp mode.
-
-
Grounding Issues
-
Poor ground connection leads to inconsistent sensor readings or overheating.
-
-
Short Circuits
-
Due to frayed insulation or DIY mods.
-
Symptoms of Harness Issues:
-
No power despite full battery.
-
Throttle unresponsive.
-
Lights not working.
-
Controller flashing error codes.
-
Inconsistent regen or brake cut.
Diagnostic Tools:
-
Multimeter: Check continuity, voltage levels.
-
OBD or Display Error Codes: Help isolate faulty components.
-
Manual Tracing: Physically inspect wires for damage.
Most issues can be resolved by cleaning, reseating, or replacing connectors. Severe issues might require replacing the entire harness.
6. Aftermarket & 72V Conversion Considerations
When upgrading to a 72V system, the wiring harness may need modification or replacement. The stock Light Bee harness is rated for 60V, and pushing 72V through older components might damage them or cause shorts.
Upgrading the Harness for 72V:
-
Replace the DC-DC Converter: Ensure it can handle 72V input.
-
Check Wire Gauge: Thicker wires (e.g., 10AWG) recommended for higher voltage/current.
-
Upgrade Connectors: Use XT90 or QS8 for battery and controller connections.
-
Fuse Rating: Use an appropriate fuse (e.g., 60A–80A) for the increased power.
-
Reinforce Insulation: Use high-temp, thick silicone wires.
-
Routing: Secure wiring to avoid rubbing/vibration damage at higher power.
Aftermarket Wiring Kits:
Many suppliers now offer plug-and-play upgraded harnesses:
-
72V-compatible
-
Better shielding
-
Waterproofing
-
Color-coded for modders
-
Pre-labeled connectors
Some even integrate extra ports for turn signals, GPS, or phone chargers, which are not included in the stock harness.
Brands to consider:
-
ChiBatterySystems
-
EBMX
-
Sur-Ronshop
-
Litespeed Bikes (custom harness builders)
7. Maintenance, Cleaning & Best Practices
To ensure a long-lasting, safe, and high-performing wiring system:
a. Regular Inspection
-
Check all connectors every 2–3 months.
-
Inspect wires for cracking, melting, or discoloration.
b. Cleaning Tips
-
Use contact cleaner for metal terminals.
-
Dry with compressed air.
-
Apply dielectric grease on all plugs to prevent corrosion.
c. Waterproofing
-
Wrap key connectors with heat shrink tubing or waterproof tape.
-
Avoid high-pressure water jets directly at connectors.
d. Protection Against Vibration
-
Use zip ties and rubber mounts to minimize wire movement.
-
Route wires away from sharp edges or high-heat components.
e. Label Modifications
-
If you do custom wiring, label everything clearly.
-
Use heat-shrink labels or color-coded wraps.
Neglecting the harness may lead to mysterious faults or performance drops. Preventive care saves both time and money.
8. Conclusion
Surron Light Bee Wiring Harness For Sale Online In Europe is more than just a bundle of wires — it’s the backbone of the bike’s electrical system. From managing power flow and ensuring safety to enabling advanced controller features and lighting systems, the harness quietly orchestrates the bike’s functionality. Whether you ride casually or push your bike to the limits off-road or on-track, maintaining a reliable harness is essential.
With the rise of 72V upgrades, controller swaps, and high-performance builds, understanding the intricacies of the wiring harness is no longer optional — it’s essential. Whether you’re a DIY modder, a performance enthusiast, or a technician, investing in a high-quality harness and understanding its structure is key to unlocking your Light Bee’s full potential.
Appendix: Quick Specs & Resources
-
Wire Gauge (Stock): 12–18 AWG depending on circuit
-
Voltage: 60V stock, up to 84V upgraded
-
Waterproofing: IP65 connectors (stock)
-
Fuse: 40A–60A depending on model
-
Upgrade Brands: EBMX, ChiBattery, Litespeed
Reviews
There are no reviews yet.