
Buy Surron Light Bee Footpeg Assembly Online In Europe
1.1 What is the Footpeg Assembly?
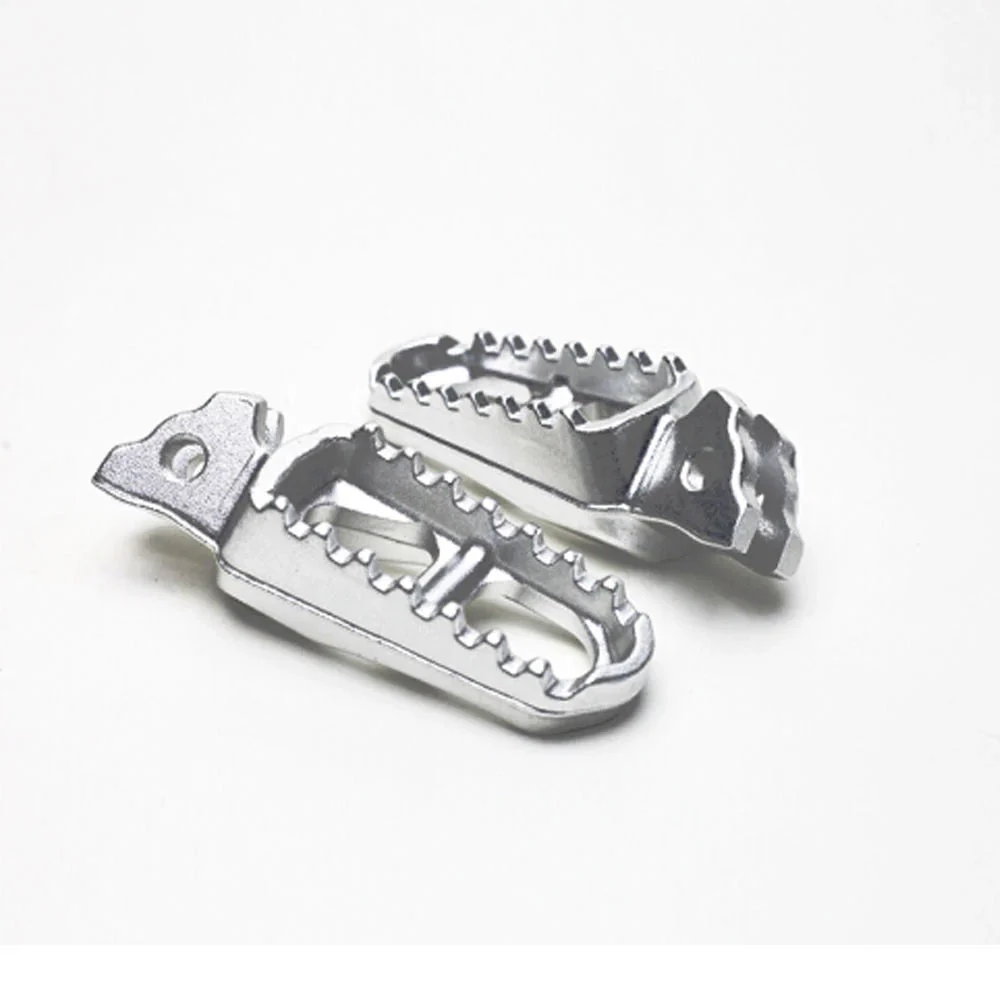
The footpeg assembly on a Surron Light Bee refers to the integrated setup that includes the footpegs themselves, the footpeg mounts (or brackets), and the associated hardware (springs, pins, and bolts). It plays a vital role in:
-
Supporting rider weight
-
Providing leverage for control
-
Allowing shifting of body weight for cornering and jumps
-
Absorbing vibrations from rough terrain
1.2 Left vs Right Footpeg Assembly
-
Right footpeg: Typically includes the mounting bracket and sometimes the brake pedal mount depending on model and customization.
-
Left footpeg: May include additional supports for chain or kickstand brackets.
While both pegs look similar, their roles and surrounding components vary, so it’s important to distinguish them during maintenance or upgrades.
2. OEM Footpeg Assembly Specifications
2.1 Materials Used
The stock Surron Light Bee footpegs and mounts are manufactured with durability in mind:
-
Footpeg Material: High-tensile steel with anti-slip serrated teeth
-
Bracket Material: Reinforced aluminum alloy or steel depending on the model
-
Hardware: Stainless steel pivot pins, springs, and locking washers
2.2 Dimensions
-
Width of pegs: Approx. 50–55 mm
-
Length: Approx. 90–100 mm
-
Weight: Around 0.5–1 kg per peg assembly
These dimensions offer a balance between comfort and performance, but aftermarket upgrades can alter this depending on preference.
3. Functionality and Ergonomics
3.1 Rider Interface
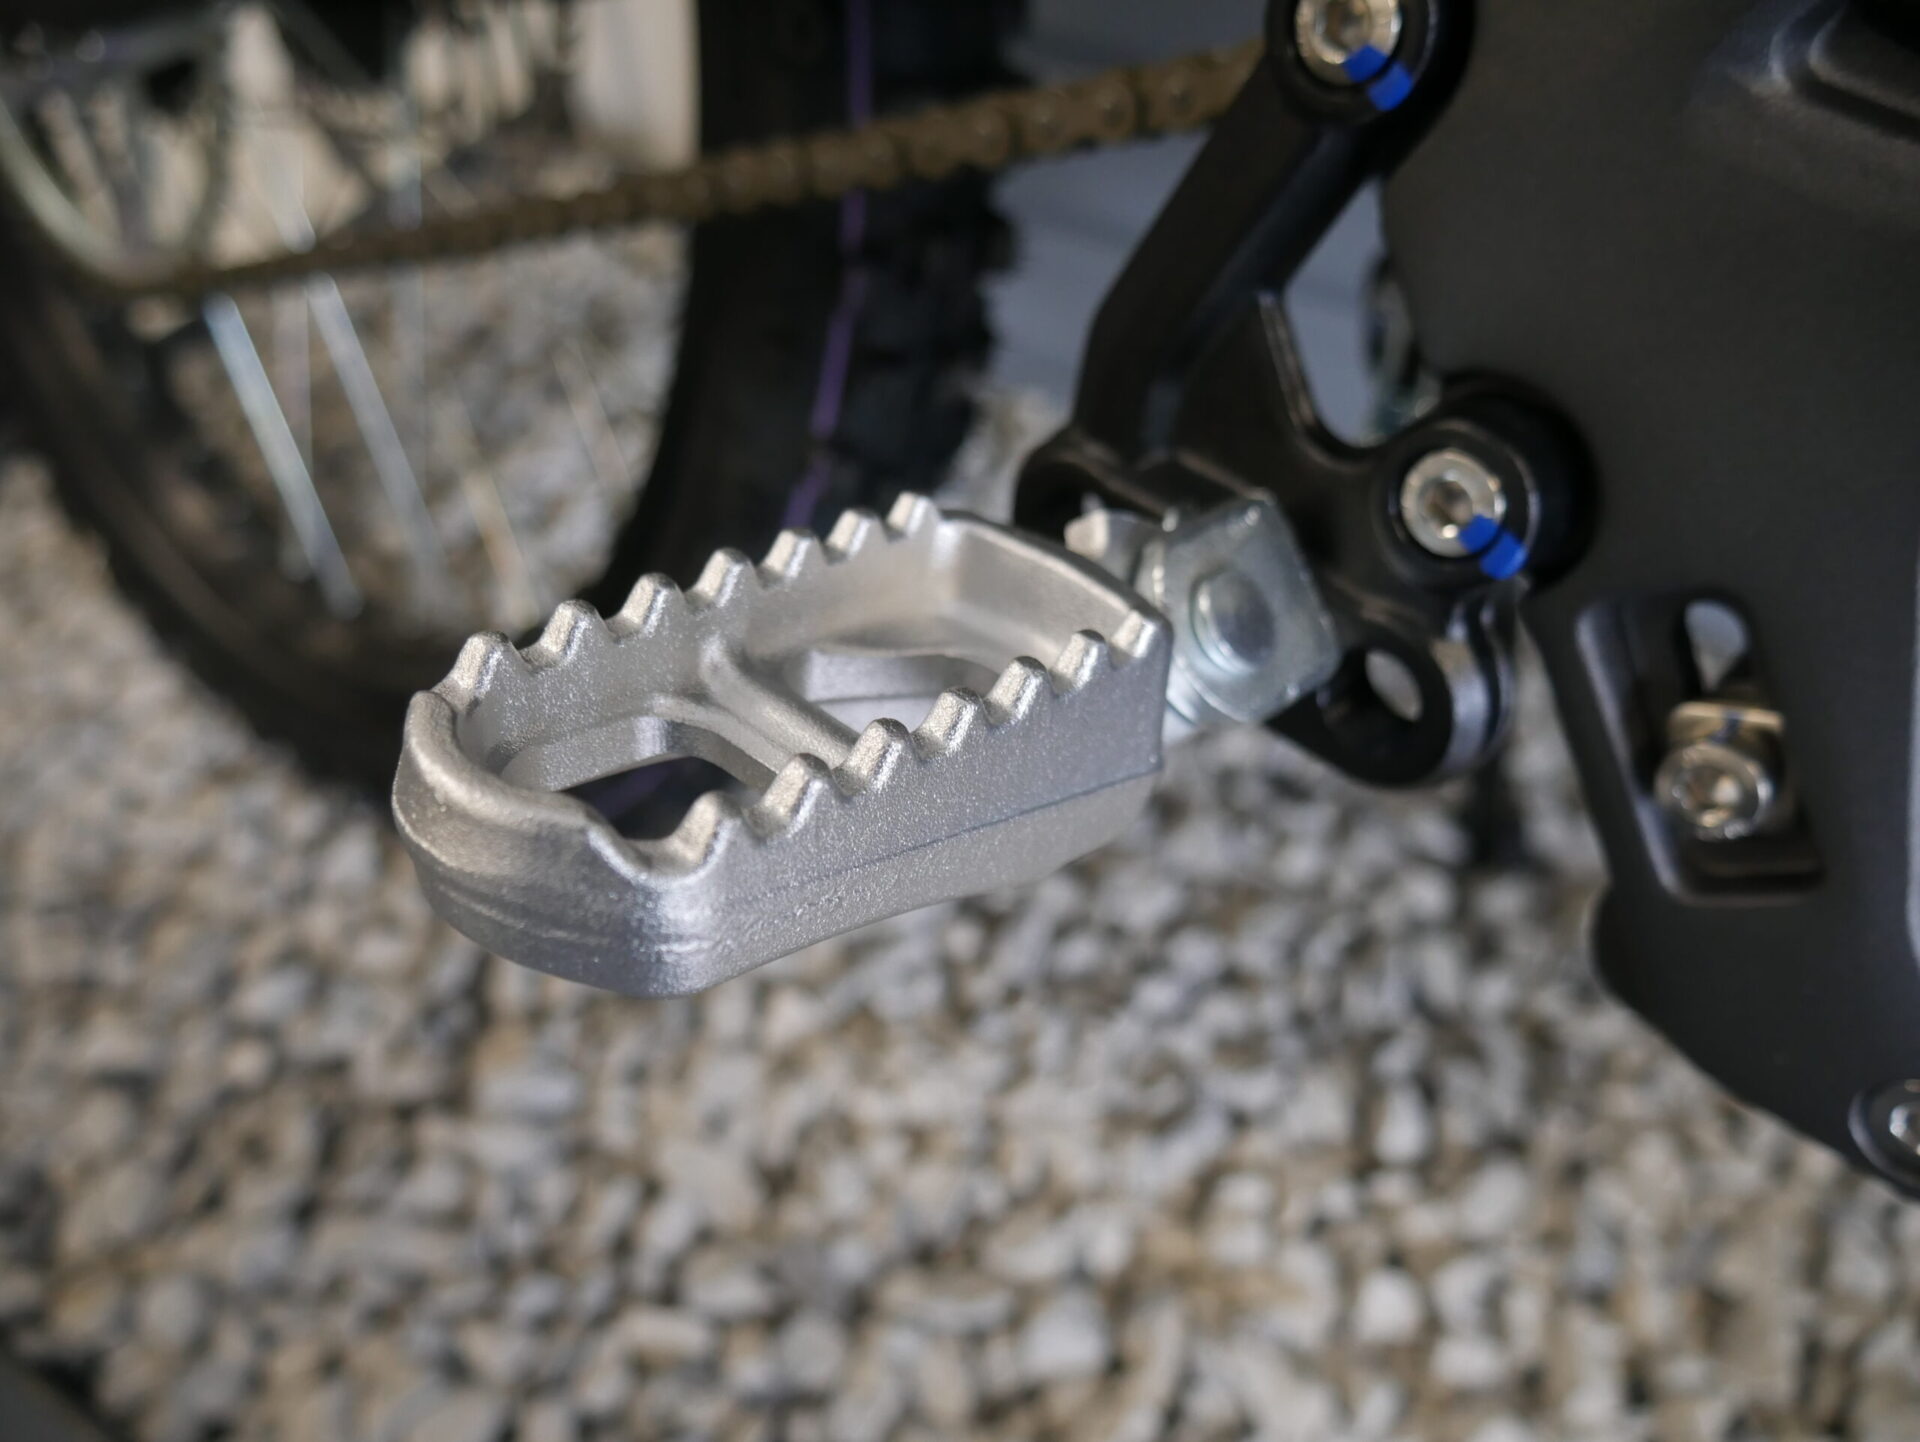
The footpegs are one of only three contact points between the rider and the bike (the others being the handlebars and seat), making them crucial for:
-
Rider balance
-
Standing during jumps and bumps
-
Transferring bodyweight for traction
-
Comfort during long rides
3.2 Pivot and Spring Mechanism
Both pegs are spring-loaded to allow folding upon contact with the ground, which prevents damage in case of impact or fall. The tension spring returns the peg to a horizontal position when released.
4. Installation Process
4.1 Tools Required
-
8mm and 10mm socket or spanner
-
Needle nose pliers
-
Hammer and punch
-
Thread locker (optional)
4.2 Step-by-Step Installation
Removing Stock Footpegs
-
Elevate the bike using a stand for better access.
-
Remove the retaining pin using a punch and hammer.
-
Take out the spring and peg carefully.
-
Inspect the bracket for wear or cracks.
Installing New Footpegs
-
Place the spring in the correct position—check orientation.
-
Insert the footpeg into the bracket.
-
Align and insert the pivot pin.
-
Secure with a cotter pin or retaining clip.
-
Test for smooth spring action.
Ensure both left and right footpegs are symmetrical in angle and resistance.
5. Maintenance and Inspection
5.1 Regular Maintenance Tips
-
Clean mud and dirt regularly to prevent binding of the spring.
-
Lubricate the pivot pin every 2–3 months.
-
Check the peg teeth for dulling or wear.
-
Tighten bolts to avoid loosening from vibration.
5.2 When to Replace
Replace your footpeg assembly if you notice:
-
Bent or cracked pegs
-
Weak or rusted springs
-
Excessive wobble in the pin
-
Uneven height or sagging
6. Common Issues and Solutions
| Issue | Cause | Solution |
|---|---|---|
| Footpeg doesn’t spring back | Broken or misaligned spring | Replace or reinstall spring |
| Peg feels loose or wobbly | Worn-out pivot pin or bracket | Replace pin or tighten bracket |
| Peg teeth are slippery | Mud buildup or worn serrations | Clean regularly or upgrade to aggressive pegs |
| Right footpeg damaged in crash | Brake pedal impact transferred to peg | Replace peg and check brake lever alignment |
| Left footpeg rattles | Loose mounting bolts | Retighten with thread locker |
7. Aftermarket Upgrades
7.1 Why Upgrade?
-
Better grip from sharper teeth
-
Wider platform for enduro-style riding
-
Lighter materials such as titanium or billet aluminum
-
Custom angles or offsets for rider ergonomics
7.2 Popular Brands
-
Warp 9 Racing
-
NTC Designs
-
Peg Armor
-
Talaria (compatible models)
-
Surron-specific CNC footpeg kits
7.3 Materials Comparison
| Material | Pros | Cons |
|---|---|---|
| Steel | Durable, cheap | Heavier, rusts without coating |
| Aluminum Alloy | Lightweight, corrosion-resistant | Softer, may bend under impact |
| Titanium | Ultra-light and strong | Expensive, overkill for casual riders |
| CNC Billet Aluminum | Precision fit, stylish | Can be costly |
8. Custom Footpeg Brackets and Relocation Kits
8.1 What is a Footpeg Relocation Kit?
These kits allow riders to move the footpegs:
-
Higher or lower for center of gravity changes
-
Forward or backward for legroom and control
-
Useful for taller riders or advanced stunt setups
8.2 Installation Considerations
-
May require new mounting holes
-
Should maintain bracket structural integrity
-
Can alter riding feel significantly—test before trail rides
9. Compatibility with Other Models
Some footpeg assemblies and mounts are cross-compatible with:
-
Surron Light Bee X
-
Surron Light Bee L1E (street-legal version)
-
Talaria Sting (with minor modifications)
Always double-check bracket dimensions and bolt alignment before swapping parts between models.
10. Safety and Legal Considerations
-
Ensure the peg teeth comply with road safety laws if you ride on-road; overly sharp designs may be illegal.
-
Use safety wire or locking clips to avoid accidental peg detachment.
-
Avoid aluminum brackets if you do aggressive jumping or trail riding—steel is safer for high-stress use.
11. Performance Tips
-
Use wider pegs for enduro and trail riding to reduce foot fatigue.
-
Angled pegs can improve cornering control and leverage.
-
Use dampening pads between the footpeg and mount to reduce vibration for longer rides.
12. Cost and Availability
| Component | Average Price (USD) | Notes |
|---|---|---|
| OEM Footpeg (each) | $20–$30 | Basic steel version |
| Aftermarket Peg Set | $50–$120 | Includes hardware and springs |
| CNC Bracket Kit | $80–$150 | Often includes both mounts |
| Full Assembly (pair) | $90–$200 | Depends on brand and materials |
Available from:
-
Surron official website
-
Luna Cycle
-
Alibaba / AliExpress
-
Local dirt bike part retailers
-
Amazon (limited availability)
13. Expert Advice for Riders
-
Aggressive riders: Upgrade to forged or CNC pegs with a wider base.
-
Casual riders: OEM or budget aftermarket pegs are sufficient.
-
Tall riders: Consider relocation kits for comfort.
-
Stunt riders: Reinforce footpeg brackets and weld gussets if needed.
Conclusion
The right and left footpeg assemblies on the Surron Light Bee may appear to be minor components, but they hold immense importance when it comes to rider performance, safety, and comfort. Understanding their structure, installation, and maintenance helps ensure your bike remains responsive and reliable, whether you’re racing, commuting, or exploring off-road trails.
Whether you keep your bike stock or opt for high-end titanium pegs with CNC brackets, always prioritize function and safety over aesthetics. With the right footpeg setup, your Surron Light Bee becomes more than just an electric bike—it becomes an extension of your riding style.
Reviews
There are no reviews yet.