Buy Surron Light Bee Kickstand Assembly Online In Europe
Buy Surron Light Bee Kickstand Assembly Online In Europe is what allows the bike to remain upright when parked. It might seem basic, but for off-road and dual-purpose electric bikes like the Surron, it must be both lightweight and rugged, capable of withstanding varied terrain, frequent use, and exposure to the elements.
2. Function and Importance
Purpose of the Kickstand
-
Stability While Stationary: Holds the bike upright when not in use.
-
Convenience: Allows quick stops without requiring a wall, stand, or secondary parking aid.
-
Safety: Prevents the bike from falling over and potentially causing damage to components or injury.
Unique Requirements for a Surron Kickstand
Given that the Surron Light Bee is often used off-road:
-
The kickstand needs to be resistant to mud, water, rocks, and impact.
-
It should not easily retract or deploy unintentionally due to vibrations or movement.
-
It should clear the ground during jumps or aggressive riding.
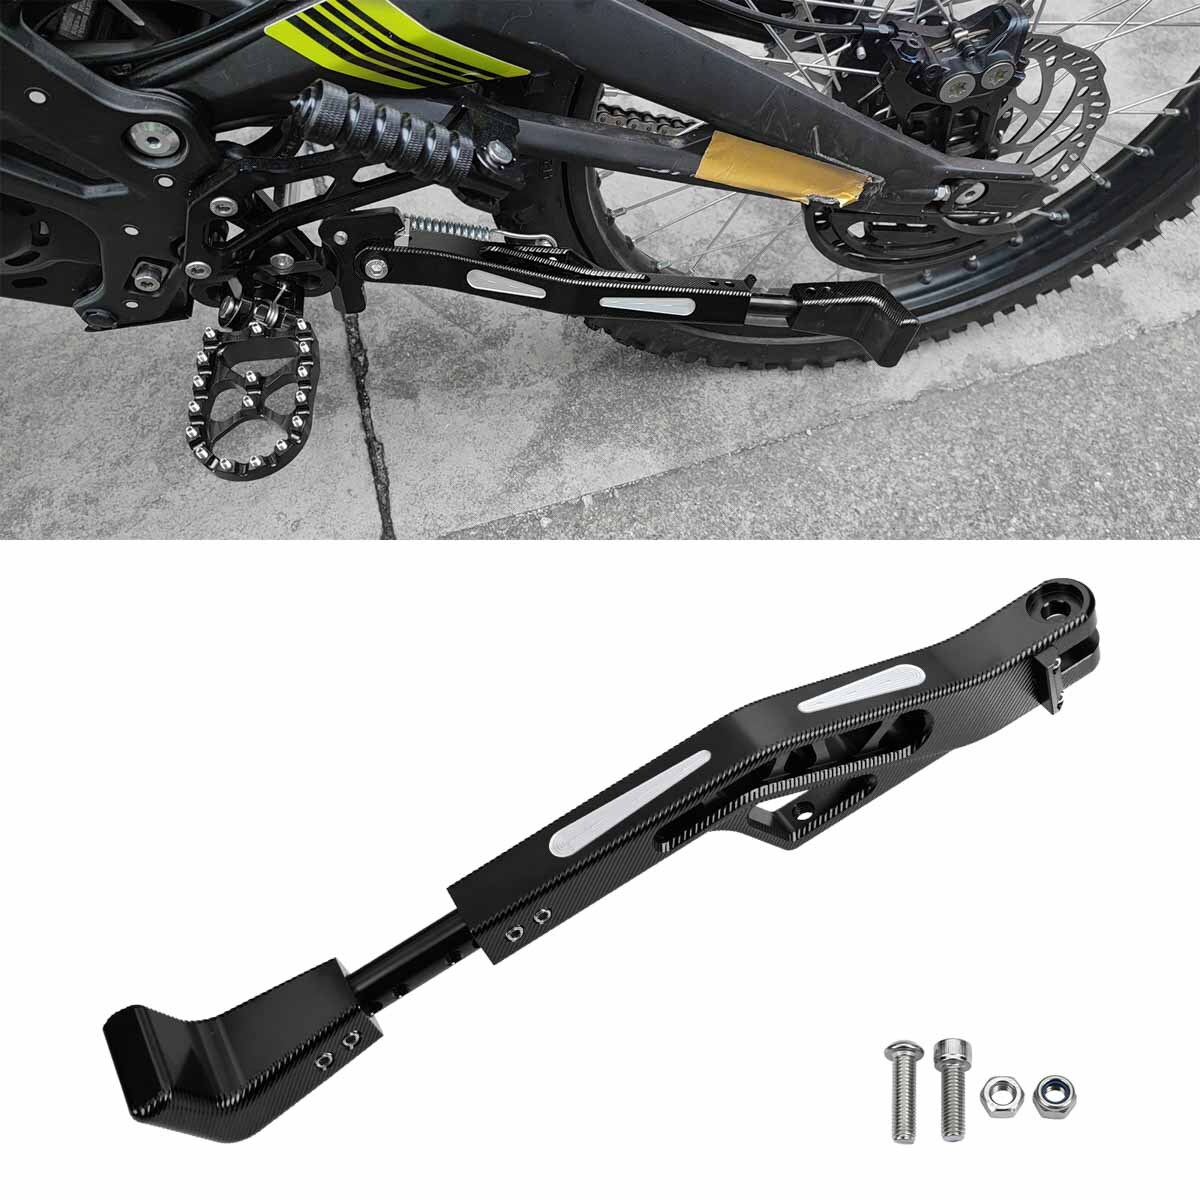
3. Components of the Kickstand Assembly
The kickstand assembly typically includes:
| Component | Description |
|---|---|
| Kickstand Arm | The main leg or lever that contacts the ground. Often made from aluminum or steel. |
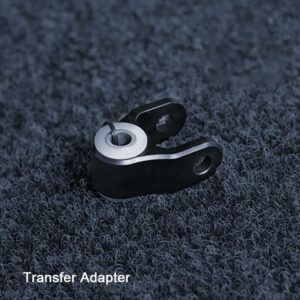
| Pivot Bolt | Connects the kickstand to the mounting bracket or frame. Allows rotation. |
| Spring | Holds the kickstand in the up or down position. Prevents accidental deployment. |
| Mounting Bracket | Sometimes built into the frame, but aftermarket versions include bolt-on mounts. |
| Stopper Plate | Prevents over-rotation of the kickstand. May be integrated or added separately. |
| Rubber Foot (optional) | Helps stabilize the base and prevent sliding on hard surfaces. |
4. Materials and Construction
Common Materials Used:
-
Aluminum Alloy (6061 or 7075): Lightweight, corrosion-resistant, and strong. Frequently used in aftermarket kickstands. Buy Surron Light Bee Kickstand Assembly Online In Europe
-
Steel: Heavier but more durable and cost-effective. Typically powder-coated or galvanized to prevent rust.
-
Stainless Steel Spring: Ensures long-lasting tension and resistance to fatigue and corrosion.
Finish Options:
-
Anodized Aluminum (Black, Red, Blue): Popular in custom builds.
-
Powder-Coated Steel: Durable and weather-resistant.
5. Compatibility and Fitment
Compatible Models:
-
Surron Light Bee X (LBX)
-
Surron Light Bee Standard
-
Surron Youth Edition (with size variation)
-
Some Segway X160/X260 models also use similar designs, with slight differences.
Mounting Points:
-
The kickstand mounts directly to the lower left side of the frame near the footpeg.
-
Bolt spacing and bracket angle must match the frame specifications.
-
Aftermarket frame plates or extended footpegs can affect fitment.
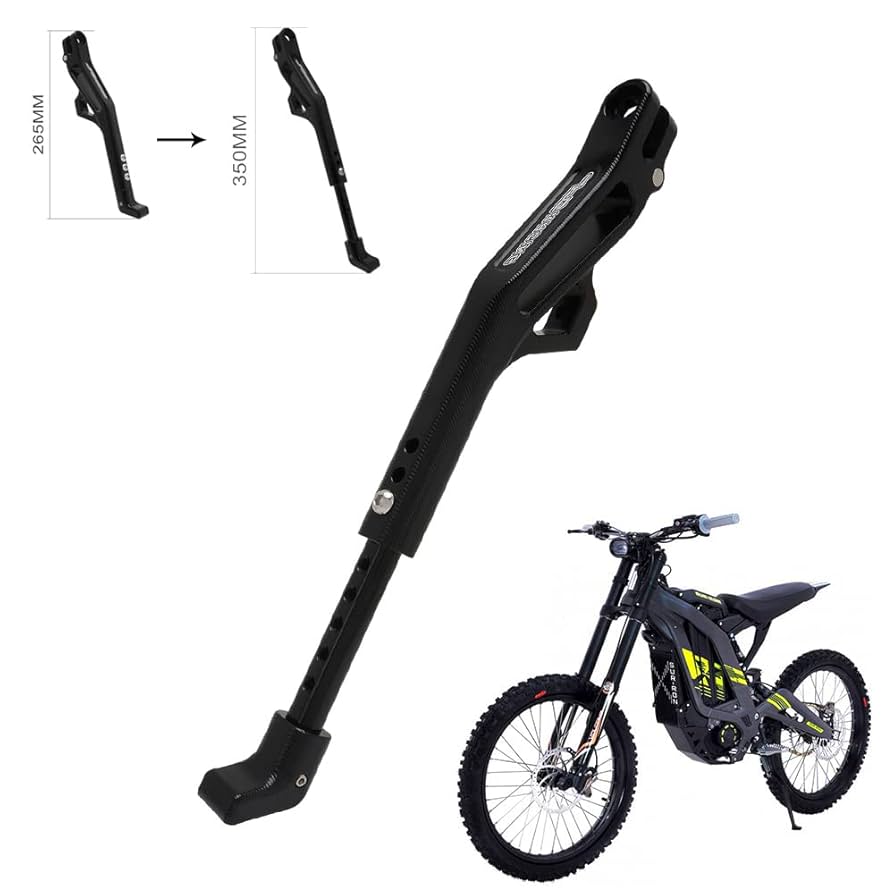
6. Kickstand Dimensions and Geometry
| Feature | Measurement (Approximate) |
|---|---|
| Length (deployed) | 240 mm – 280 mm (9.5″ – 11″) |
| Folded Clearance | 40 mm – 60 mm from frame |
| Angle of Deployment | 45° outward from the bike centerline |
| Weight | 300g – 450g depending on material |
| Bolt Size | M8 x 1.25mm pitch x 20mm length |
Note: Some aftermarket versions offer adjustable lengths or modular arms for height-tuned bikes.Buy Surron Light Bee Kickstand Assembly Online In Europe
7. Installation Guide
Tools Needed:
-
8mm or 10mm hex key or socket
-
Torque wrench (recommended)
-
Threadlocker (medium strength, e.g., Loctite Blue)
-
Grease (optional, for pivot smoothness)
Step-by-Step Installation:
-
Preparation:
-
Put the bike on a stand or lay it gently on the non-kickstand side.
-
Inspect the mounting area for any damage or obstructions.
-
-
Attach the Mounting Bracket (if aftermarket):
-
Align the bracket with the pre-drilled holes.
-
Insert mounting bolts and tighten to manufacturer’s torque specification (~20 Nm).
-
-
Install the Kickstand Arm:
-
Insert the pivot bolt through the arm and bracket.
-
Ensure the spring is installed on the correct side.
-
Apply threadlocker and tighten bolt to ~15–20 Nm.
-
-
Test Movement:
-
Swing the kickstand up and down to ensure smooth motion and correct spring tension.
-
The arm should snap into both “up” and “down” positions without sagging. Buy Surron Light Bee Kickstand Assembly Online In Europe
-
-
Ground Test:
-
Set the bike on the ground and test stability.
-
If the angle is too steep or shallow, consider adjusting or changing the kickstand length.
-
8. Maintenance Tips
Routine Maintenance:
-
Clean after muddy or wet rides.
-
Check spring tension monthly.
-
Tighten mounting bolts every 100-200 km or after off-road rides.
-
Lubricate the pivot once every 3-4 months using silicone or lithium grease.
Troubleshooting Issues:
| Problem | Cause | Solution |
|---|---|---|
| Kickstand is loose | Worn bolt or pivot | Replace pivot bolt or bushing |
| Won’t stay up | Weak or stretched spring | Replace spring |
| Scrapes ground while riding | Kickstand too long | Replace or shorten |
| Doesn’t support bike | Bent arm or loose mount | Replace kickstand arm or re-tighten bolts |
9. Aftermarket Upgrades
Several brands offer upgraded or reinforced kickstands for the Surron:
Popular Aftermarket Options:
-
Warp 9 Racing Kickstand
-
CNC billet aluminum
-
Adjustable length
-
Colors: Black, Red, Blue
-
-
Luna Cycle Reinforced Kickstand
-
Extra-thick aluminum
-
Stronger spring
-
Designed for modified/heavy bikes
-
-
Chi Battery Systems Kickstand
-
Designed for battery-swapped bikes
-
Heavy-duty spring tension
-
Key Features to Consider When Upgrading:
-
Adjustable length
-
Ground clearance
-
Reinforced bracket for off-road use
-
Aesthetic matching with bike (colors or logos)
10. Best Practices for Use
-
Always deploy the kickstand fully until the spring locks it in place.
-
Avoid using the kickstand on loose sand, deep mud, or gravel where it may sink.
-
If parking on a slope, angle the bike toward the hill and position the front wheel correctly.
-
Consider using a kickstand puck or wide foot base for soft terrain.
11. Rider Tips and Real-World Experience
Common Feedback from Riders:
-
“The stock kickstand is decent, but can wobble after months of hard use.”
-
“Upgrading to a billet aluminum one made a big difference on uneven trails.”
-
“It’s surprisingly useful even when transporting the bike in a van. A kickstand helps with loading.”
Tips from the Community:
-
Zip-tie a small rubber sleeve around the base to reduce vibration noise.
-
Carry a backup spring in your toolkit if you’re riding remote trails.
-
Some riders remove the kickstand entirely for racing or jumping sessions, as it adds minor weight and risk of snagging.
12. Summary and Final Thoughts
The Surron Light Bee kickstand assembly may appear to be a minor part of the overall bike, but it’s a key component in making the machine practical for real-world use. Whether you’re trail riding, urban commuting, or just taking a break on the track, a reliable kickstand is critical to ease of use and bike safety. Buy Surron Light Bee Kickstand Assembly Online In Europe
Here’s what makes a good kickstand assembly:
-
Durability across all terrains
-
Secure deployment and retraction
-
Proper length for modified ride heights
-
Corrosion resistance and low maintenance
For riders upgrading their bikes with 72V kits, larger wheels, or heavy batteries, replacing the stock kickstand with a heavy-duty or adjustable one is often necessary.
Whether you stay with the OEM setup or choose to upgrade, paying attention to this small but essential part ensures your bike stays upright—and out of trouble—every time you stop.
Reviews
There are no reviews yet.